
Chapter 1: Introduction to Microsoft Excel
Introduction to Microsoft Excel. I will explain everything in great detail, step by step, just like a patient teacher sitting beside you. We will use very simple language, clear examples, and helpful visuals. By the end, you will understand what Excel is, how its main parts look, and how to start working with it confidently.
1. What is Microsoft Excel and Its Main Uses?
Microsoft Excel is a spreadsheet application developed by Microsoft. It lets you create, organize, calculate, and analyze data in a grid of rows and columns.
Imagine a huge electronic table (like a giant notebook page) where each box (called a cell) can hold:
- Numbers
- Text
- Dates
- Formulas (automatic calculations)
Excel does the math for you instantly and can handle thousands or even millions of rows of data.
Common real-world uses (very practical in 2025–2026):
- Personal finance — Track monthly expenses, create budgets, calculate savings goals
- Business — Sales reports, profit/loss statements, inventory lists, payroll
- Education — Mark sheets, grade calculations, attendance records, research data analysis
- Project management — Timelines, task lists, Gantt charts
- Data analysis — Summarize large datasets, create charts for presentations
- Invoicing & receipts — Generate professional bills automatically
- Scientific & engineering — Calculations, simulations, data logging
- Dashboards — Visual summaries for managers (sales trends, KPI tracking)
In short: Excel is used wherever people need to work with lists, numbers, calculations, or visual reports.
2. Understanding the Excel Interface (Main Screen Parts)
When you open Excel (Microsoft 365, Excel 2021, 2024, or newer versions), the screen has several key areas. Let’s learn them one by one.
(Note: The images above show typical modern Excel interfaces with labeled parts like Ribbon, Quick Access Toolbar, etc.)
-
Quick Access Toolbar
- Located at the very top-left corner (small row of icons).
- Default icons: Save, Undo, Redo, and sometimes New/Open.
- You can customize it later to add your favorite buttons (e.g., Print, Copy Format).
- Purpose: Quick access to commands you use most often.
-
Ribbon
- The wide horizontal bar just below the Quick Access Toolbar.
- Divided into Tabs (Home, Insert, Page Layout, Formulas, Data, Review, View, etc.).
- Each tab contains Groups of related commands.
- Example: Home tab → Clipboard group (Cut, Copy, Paste), Font group (Bold, Italic, Font size), Alignment group, etc.
Most-used tabs:
- Home — Formatting, copy-paste, number styles
- Insert — Charts, tables, pictures, shapes
- Formulas — Functions, name manager
- Data — Sort, filter, import data
- Review — Spell check, comments, protect sheet
-
Formula Bar
- Long white bar below the Ribbon.
- Left part: Name Box (shows the address of the selected cell, e.g., A1).
- Right part: Displays or lets you edit the content/formula in the selected cell.
-
Worksheet Area (the biggest part)
- A grid of cells where you enter data.
- Columns = vertical, labeled A, B, C… Z, AA, AB… (16,384 columns).
- Rows = horizontal, labeled 1, 2, 3… (1,048,576 rows).
-
Sheet Tabs (at the bottom)
- Show worksheet names (default: Sheet1, Sheet2…).
- You can add, rename, delete, or move sheets here.
Workbook vs Worksheet:
- Workbook = the entire file (like a complete book).
- Worksheet = one page/tab inside the workbook (like one chapter).
3. Navigating Worksheets, Cells, Rows, Columns
Cell address: Every cell has a unique address = Column letter + Row number. Example:
- A1 = top-left cell
- B5 = second column, fifth row
- C10 = third column, tenth row
How to move around:
| Action | Method | Shortcut (very useful) |
|---|---|---|
| Select a cell | Click with mouse | — |
| Move one cell | Arrow keys (↑ ↓ ← →) | — |
| Move down after typing | Press Enter | — |
| Move right after typing | Press Tab | — |
| Jump to last data in direction | Ctrl + Arrow key | Ctrl + ↓ / ↑ / ← / → |
| Go to cell A1 | — | Ctrl + Home |
| Go to last used cell | — | Ctrl + End |
| Scroll one screen | — | Page Up / Page Down |
| Select entire row/column | Click row/column header | Shift + Space / Ctrl + Space |
Practice: Open Excel → click cell D10 → type “Hello” → press Enter → use arrows to move around.
4. Creating, Saving, Opening, and Closing Workbooks
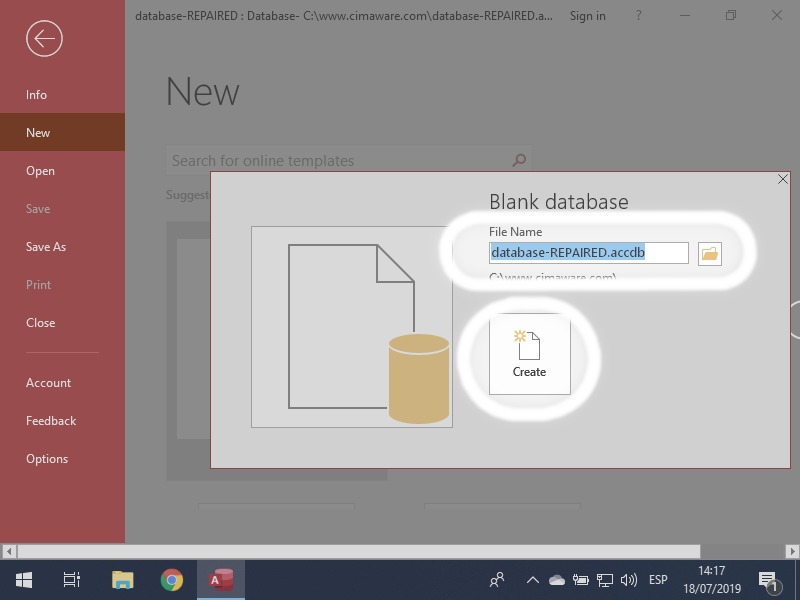
A. Create a new workbook
- Open Excel.
- On the start screen, click Blank workbook (or press Ctrl + N).
B. Save your work (very important)
- Click File → Save As (first time) or Save (later).
- Choose location (Desktop, Documents, OneDrive).
- Enter a clear name, e.g., “My_Excel_Practice_Chapter1.xlsx”.
- Click Save.
- After first save: Press Ctrl + S to update quickly.
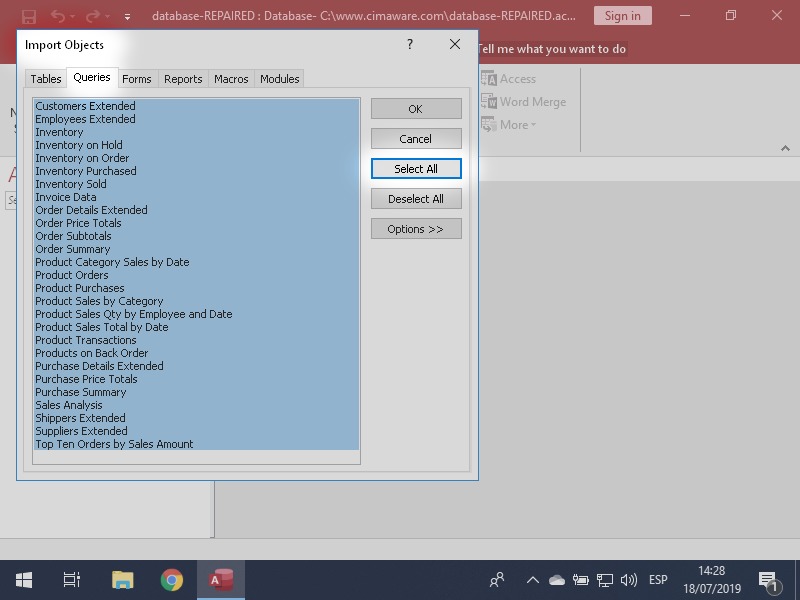
C. Open an existing workbook
- File → Open → choose from Recent or browse This PC/OneDrive. Or double-click the .xlsx file in File Explorer.
D. Close a workbook
- File → Close or
- Click the small × at the top-right of the workbook window (not the big × of Excel itself).
File types:
- .xlsx → standard modern format
- .xlsm → if you use macros (advanced)
- Avoid old .xls unless necessary
Quick Summary Table – Chapter 1 Key Points
| Topic | Description | Shortcut / Tip |
|---|---|---|
| Workbook | Complete Excel file | Ctrl + N (new) |
| Worksheet | One tab/sheet inside workbook | — |
| Cell | Single box (e.g., A1, B5) | Click or arrow keys |
| Ribbon | Main command center with tabs | Alt key shows shortcuts |
| Formula Bar | Shows/edits cell content | F2 to edit cell |
| Save | Protect your work | Ctrl + S (every 5–10 mins) |
Common Mistakes Beginners Make (and How to Avoid)
- Forgetting to save → Data lost on crash → Always Ctrl + S regularly
- Closing the wrong × → Closes Excel completely → Use File → Close instead
- Confusing workbook and worksheet → Workbook = file, Worksheet = sheet tab
- Not noticing the Formula Bar → Always check it when editing cells
Homework / Practice Suggestions
- Open Excel and create a new blank workbook.
- In Sheet1, type the following in these cells:
- A1: Your name
- B1: Today’s date (type as 26-01-2026)
- C1: Your city
- Save it as “Practice_Chapter1.xlsx” on your Desktop.
- Close the workbook, then reopen it — check if everything is still there.
- Practice moving: Click cell F15 → use arrow keys to reach A1 → use Ctrl + End to jump to the last cell.
- Explore the Ribbon: Click each tab (Home, Insert, Data…) and look at the groups and buttons.
In the next chapter, we will cover Basic Data Entry and Editing — typing text/numbers, AutoFill, copy-paste, and more.
If any part is unclear, or you want more examples/screenshots, just ask — we will go as slow as you need! 😊


